

Why You’ll Love This Lemon Curd
If you love bright, tangy flavors and silky textures, Lemon Curd is about to become your new favorite kitchen project. It comes together fast, uses simple ingredients, and turns ordinary breakfasts and desserts into something special. Plus, it smells amazing while it cooks, which is always a win.
- Quick and easy: This stovetop lemon curd takes only 5 minutes of prep and about 10 minutes of cooking time. That means you can make a fresh batch before guests arrive or between school runs.
- Bright flavor with real ingredients: Fresh lemon juice, zest, butter, sugar, and egg yolks create a rich, sunny flavor that tastes much fresher than store-bought versions. If you want to read more about the benefits of lemons, check out this helpful guide to lemon benefits.
- Very versatile: Spoon it over scones, swirl it into yogurt, or use it as a filling for tarts and cakes. It also works well in frostings, making it a handy recipe for bakers.
- Great for many diets and occasions: While the classic version uses eggs and butter, there are easy citrus swaps and egg-free options for different needs. It is also a smart make-ahead treat for brunches, holidays, and gifting.
Think of Lemon Curd as a little jar of sunshine. One spoonful can brighten toast, pancakes, cheesecake, or even a plain bowl of yogurt.
Because it is creamy, tangy, and just sweet enough, this recipe fits busy parents, students, working professionals, baking fans, and party hosts alike. It is the kind of homemade treat that feels fancy without asking for much effort.
Jump to:
- Why You’ll Love This Lemon Curd
- Essential Ingredients for Lemon Curd
- Special Dietary Options
- How to Prepare the Perfect Lemon Curd: Step-by-Step Guide
- First Step: Set up your double boiler
- Second Step: Mix the base ingredients
- Third Step: Cook until thick
- Fourth Step: Add the butter
- Fifth Step: Strain if needed
- Final Step: Chill and set
- Protein and Main Component Alternatives
- Egg yolk swaps for different needs
- Butter alternatives
- Vegetable, Sauce, and Seasoning Modifications
- Citrus swaps and flavor twists
- Seasoning ideas for a new spin
- Mastering Lemon Curd: Advanced Tips and Variations
- Pro cooking techniques
- Flavor variations
- Presentation tips
- Make-ahead options
- How to Store Lemon Curd: Best Practices
- Refrigeration
- Freezing
- Reheating
- FAQs: Frequently Asked Questions About Lemon Curd
- How do you make lemon curd from scratch?
- How long does homemade lemon curd last in the fridge?
- Can I make lemon curd without eggs?
- Why is my lemon curd grainy and how do I fix it?
- Can I make lemon curd with other citrus fruits?
- Lemon Curd
- Ingredients
- Instructions
- Last Step:
- Notes
- Nutrition
- Did you make this recipe?
Essential Ingredients for Lemon Curd
To make a smooth, glossy batch of Lemon Curd, gather these ingredients before you start. The amounts below yield about 1 to 1.5 cups.
- 4 large egg yolks – These give the curd its rich texture and help it thicken. For a thicker curd, replace 2 egg yolks with 1 whole egg.
- 2/3 cup granulated sugar – Adds sweetness and helps balance the tart lemon juice.
- 1 tablespoon lemon zest – Usually from about 1 lemon, this adds a strong citrus aroma and extra lemon flavor.
- 1/3 cup fresh lemon juice – From about 2 to 3 lemons, this gives the curd its bright, tangy kick.
- 1/8 teaspoon salt – Sharpens the flavor and keeps the curd from tasting flat.
- 6 tablespoons unsalted butter – Softened and cut into 6 pieces, this melts into the curd and makes it silky. If you prefer, use salted butter and omit the added salt.
Special Dietary Options
- Vegan: For an egg-free version, use a cornstarch-based lemon curd with plant-based butter. It will be a little different in texture, but still creamy and tart.
- Gluten-free: This recipe is naturally gluten-free as written, which makes it a great choice for gluten-sensitive guests.
- Low-calorie: You can reduce the sugar slightly, but keep in mind that lemon curd needs enough sweetness to balance the acidity and stay smooth.
| Recipe Detail | Info |
|---|---|
| Prep Time | 5 minutes |
| Cook Time | 10 minutes |
| Total Time | 1 hour 15 minutes including cooling |
| Category | Dessert |
| Method | Stovetop |
| Cuisine | American |
How to Prepare the Perfect Lemon Curd: Step-by-Step Guide
Making Lemon Curd from scratch is easier than it sounds, but the key is gentle heat and steady whisking. If you have ever worried about curdling eggs, do not panic. A double boiler gives you much more control, and once you see the mixture thicken, you will feel like a pro.
First Step: Set up your double boiler
Fill the bottom of a double boiler with 1 to 2 inches of water and bring it to a simmer over high heat. After it starts simmering, reduce the heat to low so the water stays gentle. If you do not have a double boiler, place a heatproof glass bowl over a saucepan of simmering water. This setup helps the curd cook slowly and keeps the eggs from scrambling.
Second Step: Mix the base ingredients
In the top pot or bowl, whisk together the egg yolks, sugar, lemon zest, lemon juice, and salt. Keep whisking constantly as the mixture warms. This part matters because the sugar needs to dissolve and the eggs need to cook evenly. You want everything smooth before the thickening starts.
Third Step: Cook until thick
Keep whisking over the simmering water until the mixture thickens to a hollandaise sauce texture. This usually takes about 10 minutes, and the temperature should reach 170°F. If it is not thickening, raise the heat a little while still whisking. The mixture should coat the back of a spoon and look glossy, not lumpy. This is the moment where patience pays off.
Good Lemon Curd should look silky, not scrambled. If you whisk constantly and keep the heat gentle, you are already ahead of the game.
Fourth Step: Add the butter
Remove the pot from the heat once the curd reaches the right thickness. Add the softened butter pieces and whisk until completely melted and blended. The butter gives the curd its smooth finish and rich taste. If you want an extra silky texture, keep whisking until the surface looks shiny and even.
Fifth Step: Strain if needed
If you notice any tiny bits of cooked egg, strain the curd through a fine-mesh sieve into a clean bowl or jar. This step is optional, but it is a smart move if you want the smoothest result. A quick strain can rescue a slightly grainy batch and make the texture feel more luxurious.
Final Step: Chill and set
Pour the Lemon Curd into a jar or bowl. Cover the surface directly with plastic wrap so a skin does not form while it cools. Refrigerate it until set, which usually takes about 1 hour and 15 minutes total including cooling. Once chilled, it should be thick enough to spoon, spread, or swirl into your favorite treats.
For readers who love lemon baking, you might also enjoy these lemon blueberry muffins for a bright breakfast pairing. If you want something a little more indulgent, try almond croissants with a spoonful of curd on the side.
Protein and Main Component Alternatives
Egg yolk swaps for different needs
The classic version of Lemon Curd depends on egg yolks for richness and thickening, but there are a few smart ways to adjust the base if needed. If you want a thicker curd, replace 2 of the egg yolks with 1 whole egg. That small change adds extra structure while keeping the texture creamy. If you need an egg-free version, use a cornstarch-thickened lemon curd instead.
For a vegan-style batch, whisk together lemon juice, sugar, water, cornstarch, lemon zest, and plant-based butter over medium heat. This creates a spread that still tastes bright and works well on toast, cupcakes, and scones. It will set a little firmer than the egg-based version, but it still gives you that lovely citrus flavor.
Butter alternatives
Butter gives Lemon Curd its classic body and shine, but you can make a few easy swaps if needed. Salted butter works fine if you leave out the added salt. If you are dairy-free, use a high-quality plant-based butter that melts smoothly. The flavor may shift slightly, but the curd will still be spreadable and tasty.
If you want a richer citrus spread for brunch, serve it alongside soft baked goods like baked oatmeal cups. The combo is especially nice for busy mornings when you want something simple but still special.
Vegetable, Sauce, and Seasoning Modifications
Citrus swaps and flavor twists
Lemon Curd is flexible, and that makes it fun for home cooks who like to play with flavor. You can swap lemons for limes, grapefruit, oranges, or even pineapple juice. Use the same basic method and cooking time, but adjust the sweetness when needed. Oranges usually need a little less sugar because they are naturally sweeter, while grapefruit may need a touch more sugar to balance its bitterness.
For lime curd, use the same ratio of juice and zest for a sharper, tropical twist. Pineapple curd is great for warm-weather desserts, though you may want to simmer the juice first to concentrate the flavor. These citrus versions work beautifully in tarts, macarons, parfaits, or layered cakes.
Seasoning ideas for a new spin
While Lemon Curd is already bold on its own, a few tiny flavor tweaks can make it feel fresh and new. Try adding a pinch of vanilla for roundness, or a little extra zest if you want more punch. A small amount of fresh ginger can bring a warm note, especially if you plan to serve it with waffles or pancakes. If you like dessert flavors with more depth, a spoonful of curd mixed into frosting can brighten buttercream without making it too sweet.
For a breakfast spread, pair it with simple baked goods and a warm drink. If you are in the mood for another cozy recipe, chocolate chip banana bread is a nice match for a swipe of lemon curd on the side.
Mastering Lemon Curd: Advanced Tips and Variations
Pro cooking techniques
The best Lemon Curd starts with gentle heat. A double boiler or a heatproof bowl over simmering water helps protect the eggs from curdling and keeps the flavor clean, without a metallic note. Whisk constantly so the mixture heats evenly and does not stick to the bottom of the bowl. If you have a kitchen thermometer, aim for 170°F, which is the sweet spot for a thick but smooth curd.
Fresh-squeezed juice matters more than you might think. Bottled juice can taste flat, while fresh lemons give the curd a bright, lively finish. For the smoothest result, strain the mixture if there are any tiny bits of zest or egg. That one extra step can take the texture from good to wonderfully silky.
Flavor variations
Want to change things up? Add more zest for a sharper citrus bite, or use part lemon and part orange for a softer, sweeter flavor. A little grapefruit juice can make the curd more grown-up and slightly bitter in a pleasant way. Pineapple gives it a tropical feel that works nicely in summer desserts. Since the method stays the same, you can test different versions without learning a whole new recipe.
Presentation tips
Spoon Lemon Curd into small jars for gifting, or serve it in a pretty bowl with a tiny spoon for brunch. It looks especially nice on top of pancakes, waffles, crepes, cheesecake, and cookies. You can also add a fresh berry or a thin lemon slice for color. If you are serving it with tea or coffee, a neat swirl on the plate makes the whole table feel a little more polished.
Make-ahead options
This recipe is a great make-ahead choice for busy schedules. Since it needs time to cool and set, you can prepare it the night before a brunch or party. Freeze extra portions for later, then thaw in the fridge when you need them. That way, you always have a sunny dessert topper ready to go.
How to Store Lemon Curd: Best Practices
Refrigeration
Store Lemon Curd in a clean, airtight jar or container in the refrigerator. It usually lasts 1 to 2 weeks when kept cold and handled with clean utensils. Try not to dip in with a spoon that has crumbs or butter on it, since that can shorten the shelf life.
Freezing
If you want to keep it longer, freeze Lemon Curd for 3 to 6 months. Portion it into small containers or even ice cube trays so you can thaw only what you need. Leave a little headspace for expansion. When you are ready to use it, thaw it overnight in the fridge and stir well before serving.
Reheating
Most of the time, you do not need to reheat lemon curd. If it feels too firm after chilling, let it sit at room temperature for a few minutes or give it a gentle stir. Avoid high heat, since that can break the texture. If it has separated a bit after freezing, a quick stir usually brings it back together.
For the best texture and taste, chill Lemon Curd fully before serving. It thickens as it cools, so patience really helps here.

FAQs: Frequently Asked Questions About Lemon Curd
How do you make lemon curd from scratch?
To make lemon curd from scratch, you’ll need 3/4 cup fresh lemon juice, 1 tablespoon lemon zest, 3/4 cup sugar, 3 large eggs, 1/2 cup unsalted butter (cubed), and a pinch of salt. In a medium saucepan over low heat, whisk together juice, zest, sugar, eggs, and salt until smooth. Add butter gradually while stirring constantly. Cook for 8-10 minutes until it thickens to coat the back of a spoon (about 170°F). Strain through a fine-mesh sieve to remove bits, then pour into jars. Cool to room temperature before refrigerating. This yields about 2 cups and takes 20 minutes total. Pro tip: Use a double boiler to prevent curdling. Store in the fridge for up to 2 weeks. Perfect for tarts, cakes, or toast.
How long does homemade lemon curd last in the fridge?
Homemade lemon curd lasts 1-2 weeks in the fridge when stored in an airtight jar or container. For best quality, keep it at 40°F or below and avoid metal utensils that could react with the acidity. Signs it’s gone bad include mold, off odors, or separation. To extend shelf life, freeze it in portions: spoon into ice cube trays or freezer bags, leaving headspace for expansion. It freezes well for up to 3 months—thaw overnight in the fridge and stir before using. Always label with dates. If canning for longer storage, process in a water bath for 10 minutes, but fresh is best for flavor. This preserves the bright, tangy taste without preservatives.
Can I make lemon curd without eggs?
Yes, you can make egg-free lemon curd using cornstarch as a thickener. Combine 1/2 cup lemon juice, 1/2 cup sugar, 1/4 cup cornstarch, 1/4 cup water, 2 tablespoons butter, and lemon zest in a saucepan. Whisk over medium heat until bubbling and thick (5-7 minutes), then stir in butter off heat. Cool and chill. This vegan version mimics the creamy texture without eggs, ideal for allergies or dietary needs. It sets firmer than egg-based but spreads well on scones or fills cupcakes. Yield: 1.5 cups. Adjust sugar for tartness. Store like regular curd (1 week fridge, 3 months freezer). Add coconut milk for extra creaminess.
Why is my lemon curd grainy and how do I fix it?
Grainy lemon curd usually results from overcooking (eggs curdle at 180°F+), undissolved sugar, or zest bits. To fix: Strain through a fine sieve while warm, then blend with an immersion blender for smoothness. Prevention tips: Whisk constantly on low heat or use a double boiler; dissolve sugar fully before adding eggs; finely grate zest. If too thin, cook longer to 175°F. Undercooked curd won’t set—reheat gently with more whisking. Test doneness by dragging a spatula through; it should hold. Salvage batches by blending with extra butter. Fresh curd should be silky like pudding. Troubleshoot early for perfect results every time.
Can I make lemon curd with other citrus fruits?
Yes, swap lemons for limes, oranges, grapefruits, or even pineapple juice in the same recipe. For limes, use 3/4 cup juice and 1 tablespoon zest for a tangy twist. Oranges need slightly less sugar (reduce by 2 tablespoons) due to natural sweetness. Grapefruit adds a bitter edge—balance with extra sugar. Pineapple curd works great for tropical cakes; simmer 3/4 cup juice first to concentrate flavors. Always use fresh juice for brightness. Cooking time stays 8-10 minutes. Yields the same creamy texture. Experiment with cranberry juice for holidays (add 1/4 cup for tartness). Store all versions up to 2 weeks refrigerated. Versatile for pies, macarons, or yogurt parfaits.
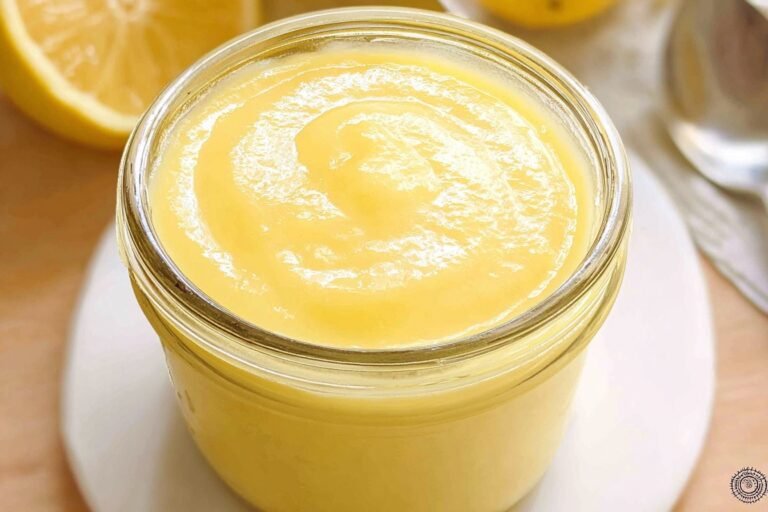
Lemon Curd
🍋 Silky smooth homemade lemon curd delivers vibrant tangy brightness – versatile pantry star!
🥄 Luscious spread transforms scones, tarts, yogurt effortlessly – fresher than store-bought!
- Total Time: 1 hour 15 minutes
- Yield: 1.5 cups (12 servings)
Ingredients
– 4 large egg yolks
– 2/3 cup granulated sugar
– 1 tablespoon lemon zest
– 1/3 cup fresh lemon juice
– 1/8 teaspoon salt
– 6 tablespoons unsalted butter
Instructions
1-First Step: Set up your double boiler Fill the bottom of a double boiler with 1 to 2 inches of water and bring it to a simmer over high heat. After it starts simmering, reduce the heat to low so the water stays gentle. If you do not have a double boiler, place a heatproof glass bowl over a saucepan of simmering water. This setup helps the curd cook slowly and keeps the eggs from scrambling.
2-Second Step: Mix the base ingredients In the top pot or bowl, whisk together the egg yolks, sugar, lemon zest, lemon juice, and salt. Keep whisking constantly as the mixture warms. This part matters because the sugar needs to dissolve and the eggs need to cook evenly. You want everything smooth before the thickening starts.
3-Third Step: Cook until thick Keep whisking over the simmering water until the mixture thickens to a hollandaise sauce texture. This usually takes about 10 minutes, and the temperature should reach 170°F. If it is not thickening, raise the heat a little while still whisking. The mixture should coat the back of a spoon and look glossy, not lumpy. This is the moment where patience pays off.
4-Fourth Step: Add the butter Remove the pot from the heat once the curd reaches the right thickness. Add the softened butter pieces and whisk until completely melted and blended. The butter gives the curd its smooth finish and rich taste. If you want an extra silky texture, keep whisking until the surface looks shiny and even.
5-Fifth Step: Strain if needed If you notice any tiny bits of cooked egg, strain the curd through a fine-mesh sieve into a clean bowl or jar. This step is optional, but it is a smart move if you want the smoothest result. A quick strain can rescue a slightly grainy batch and make the texture feel more luxurious.
6-Final Step: Chill and set Pour the Lemon Curd into a jar or bowl. Cover the surface directly with plastic wrap so a skin does not form while it cools. Refrigerate it until set, which usually takes about 1 hour and 15 minutes total including cooling. Once chilled, it should be thick enough to spoon, spread, or swirl into your favorite treats.
Last Step:
Please leave a rating and comment letting us know how you liked this recipe! This helps our business to thrive and continue providing free, high-quality recipes for you.Notes
🔥 Double boiler prevents curdling and metallic taste – bowl over pot works too!
🍋 Fresh-squeezed juice essential; limes or oranges sub perfectly.
🥄 Whisk constantly for that signature silky, velvety texture.
- Prep Time: 5 minutes
- Chilling Time: 1 hour
- Cook Time: 10 minutes
- Category: Desserts
- Method: Stovetop
- Cuisine: American
- Diet: Vegetarian, Gluten-Free
Nutrition
- Serving Size: 2 tablespoons
- Calories: 110 kcal
- Sugar: 11g
- Sodium: 60mg
- Fat: 7g
- Saturated Fat: 4g
- Unsaturated Fat: 3g
- Trans Fat: 0g
- Carbohydrates: 12g
- Fiber: 0g
- Protein: 1g
- Cholesterol: 40mg