Ingredients
– 12 sugar cookies for the base
– 2 cups royal icing for melting snow effect and holding everything together
– 6 marshmallows, cut in half for the snowman’s head
– long orange sprinkles for carrot nose
– candy-coated chocolate pieces (small, round) for buttons
– black gel food color for icing details like eyes and mouth
Instructions
1-First Step: Prepare Your Icing Take 1/2 cup of the royal icing and mix in the black gel food color until it’s even. Thin this black icing to a 15-second consistency, which means it should smooth out in about 15 seconds when you draw a line through it with a knife. Put this black icing into a piping bag fitted with a small tip for precise work. This step helps create the details that make your snowman pop.
2-Second Step: Thin the White Icing Now, thin the remaining 2 cups of white royal icing to a 10-second consistency so it’s easy to spread. Place this in another piping bag with a small tip. This prepares the base layer that gives the melting effect, and you can adapt it by using a different icing if you prefer a dairy-free option.
3-Third Step: Frost the Cookies Frost each of the 12 sugar cookies with the thinned white icing, letting it drip a bit over the edges to mimic melting snow. Work quickly to keep the icing wet for the next additions. For dietary tweaks, use gluten-free cookies here to suit those needs, keeping the fun intact.
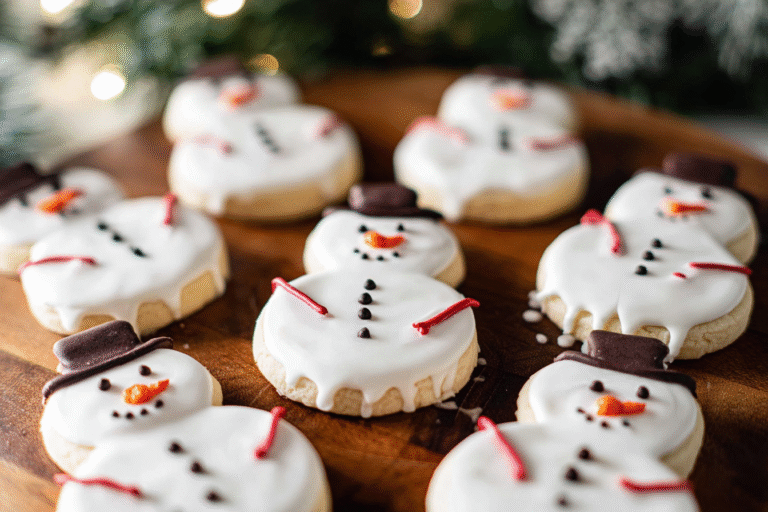
4-Fourth Step: Add the Snowman Features While the white icing is still wet, place a halved marshmallow (cut side down) near the back of each cookie to form the head. Add 2-3 small, round candy-coated chocolate pieces down the front as buttons for a playful look. Then, use the black icing to pipe stick arms extending from the head, creating that classic snowman shape. This is a great spot to get creative, like using vegan candies if needed.
5-Fifth Step: Let It Set and Add Details Let the cookies sit at room temperature for 20-30 minutes so the icing can set. Once that’s done, use the black icing to pipe two eyes and an open ‘O’ shaped mouth on the marshmallow head. Attach one long orange sprinkle vertically as the nose with a tiny dab of leftover white icing. If you’re making this for kids, keep an eye on the timing to ensure it’s all kid-friendly and safe.
6-Final Step: Finishing Touches and Serving After decorating, allow the cookies to dry fully, which takes about 20 minutes as per the preparation time. Serve them right away for the best taste, or store them for later as mentioned in other sections. These melting snowman cookies are a hit at winter gatherings, and you can link them to other baking ideas like our chocolate chip banana bread recipe for more treats.
Last Step:
Please leave a rating and comment letting us know how you liked this recipe! This helps our business to thrive and continue providing free, high-quality recipes for you.Notes
🎨 These cookies are a fun decorating activity for children on snowy days.
🍪 You can use your favorite royal icing and sugar cookie recipes or store-bought versions.
💨 Allow decorated cookies to dry completely at room temperature overnight; a fan can help speed drying without affecting marshmallows.
- Prep Time: 20 minutes
- Category: Dessert, Holiday
- Method: Decorating
- Cuisine: American
- Diet: Vegetarian
Nutrition
- Serving Size: 1 cookie