Ingredients
6 large organic eggs Provide the base and essential proteins for structure and nutrition
Natural food coloring derived from beetroot, turmeric, spirulina Offers vibrant, chemical-free colors
1/4 cup coconut sugar Adds subtle sweetness with a lower glycemic index
1/2 cup almond flour Enhances texture while keeping it gluten-free
1 tbsp flaxseed meal mixed with water as an egg substitute for vegan options
Almond flour or coconut flour for gluten-free
Stevia or erythritol to reduce calories for low-calorie
Instructions
Gathering and Preparing Ingredients: First, collect all items like organic eggs and your natural dye sources. If you’re making dyes, place choices such as 1-2 cups red onion skins or 1-2 chopped beets into a pot, then add 1 quart of water and 2 tablespoons of distilled white vinegar. Simmer this mix for at least 30 minutes to pull out rich colors, cooling and straining it afterward for use.
Boiling the Eggs: Second, hard boil the organic eggs by placing them in a saucepan, covering with cold water, and bringing to a boil. Once it boils, reduce heat to simmer for 9-12 minutes, then move the eggs to an ice bath to cool them down quickly. This step ensures the eggs are ready for coloring without any cracks, keeping your natural Easter Eggs picture-perfect.
Dyeing Process: Third, after the eggs cool, gently crack and peel them. Then, dip the peeled eggs into the prepared natural dyes for 5-10 minutes, adjusting based on how deep you want the colors think 30 minutes for pastels or overnight for bold shades as noted in the dye instructions.
Dyeing Process: Fourth, gently place the hard-boiled eggs into the cooled dye baths, making sure they are fully submerged to achieve even color. Soak times vary: 30 minutes for pastel shades, several hours for deeper colors, and overnight for the most vibrant results, as natural dyes take longer than store-bought ones.
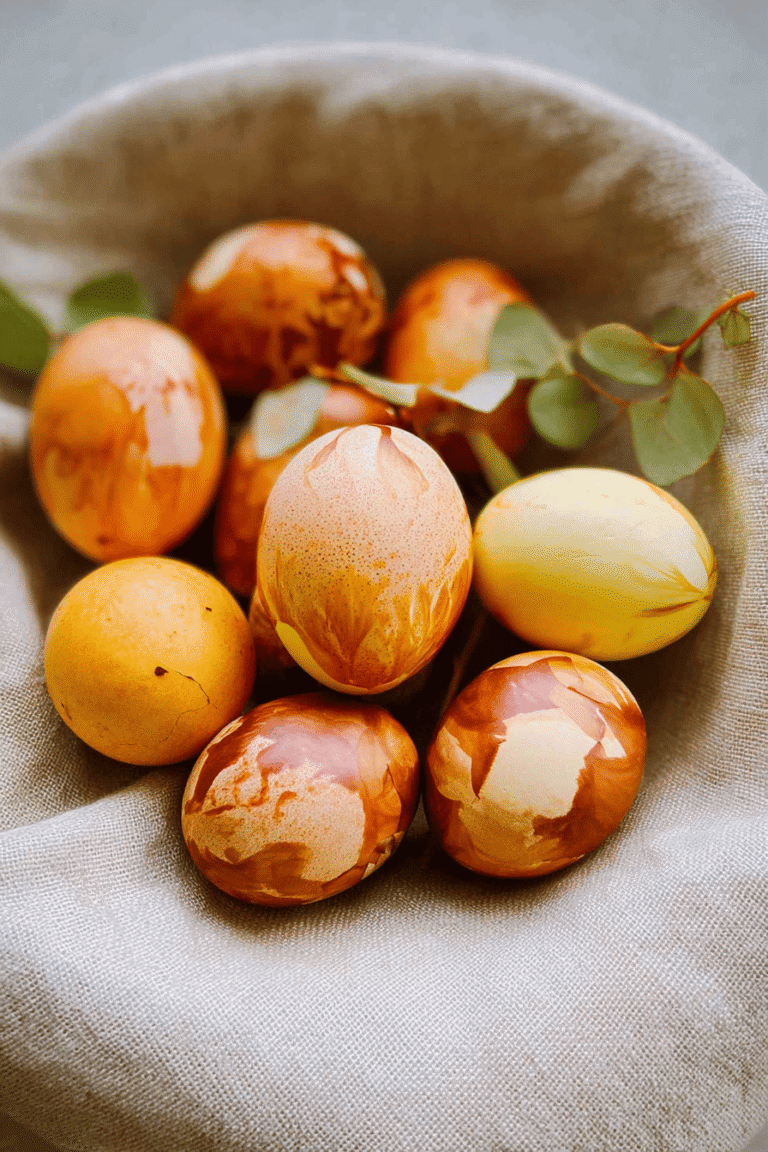
Finishing Touches: Fifth, remove the eggs from the dye using a spoon and let them dry on paper towels. Finally, arrange them on a platter, perhaps polishing with a bit of coconut oil for shine. This process is not only economical but also an engaging activity for children, exploring color combinations like turmeric for yellow or red cabbage for blue.
Last Step:
Please leave a rating and comment letting us know how you liked this recipe! This helps our business to thrive and continue providing free, high-quality recipes for you.Notes
🥄 Natural dyes take longer soaking times than commercial dyes for best colors.
🍋 Distilled white vinegar helps colors adhere better to eggshells.
🎨 Handle dye baths carefully to avoid staining surfaces or skin.
- Prep Time: 15 minutes
- Soaking time: 30 minutes to overnight
- Cook Time: 30 minutes
- Category: Craft/Activity
- Method: Natural Dyeing
- Cuisine: N/A
- Diet: Vegetarian, Vegan, Gluten-Free
Nutrition
- Serving Size: 1 dyed egg
- Calories: 0
- Sugar: 0g
- Sodium: 0mg
- Fat: 0g
- Saturated Fat: 0g
- Unsaturated Fat: 0g
- Trans Fat: 0g
- Carbohydrates: 0g
- Fiber: 0g
- Protein: 0g
- Cholesterol: 0mg