Ingredients
– 1 cup creamy peanut butter for building the flavor and creamy center
– 1/2 cup unsalted butter for making the filling rich and smooth
– 2 cups powdered sugar for helping the filling firm up
– 1/4 teaspoon salt for balancing sweetness
– 1 teaspoon vanilla extract for adding warmth and depth
– 2 cups milk chocolate for creating the chocolate shell
Instructions
1-Step 1: Melt the peanut butter mixture Start by adding the 1 cup creamy peanut butter and 1/2 cup unsalted butter to a microwave-safe bowl. Heat the mixture until melted, then stir until it looks smooth and glossy. If it still looks a little lumpy, microwave it for an extra 10 seconds and stir again. This first step matters because a smooth base makes shaping much easier later.
2-Step 2: Mix in the sweeteners and flavorings Stir in 1/4 teaspoon salt, 1 teaspoon vanilla extract, and 2 cups powdered sugar. Mix until everything is fully combined and the dough feels thick. If you are making these for a family with mixed tastes, this is also the point where you can note whether you want to use almond butter, cashew butter, or crunchy peanut butter next time.
3-Step 3: Shape the filling into eggs Scoop out portions of the peanut butter mixture and shape them into balls first. Then flatten each one gently into an egg shape. Wearing gloves can help keep the dough from sticking to your hands, which is especially handy if you are making a big batch with kids or for a party tray. Try to keep the eggs a similar size so they dip and set evenly.
4-Step 4: Chill until firm Place the shaped eggs on a parchment-lined tray and chill them for 30 minutes. This step helps them hold their shape when they go into the melted chocolate. If you are in a warm kitchen, keep them chilled until the last possible minute so the coating goes on smoothly.
5-Step 5: Melt the chocolate Add 2 cups milk chocolate for dipping to a microwave-safe bowl. Heat it in 30-second increments, stirring between each round. This slower method helps keep the chocolate from scorching. If you prefer a darker flavor, this is also a good time to use dark chocolate or white chocolate instead.
6-Step 6: Dip and coat the eggs Dip each chilled egg into the melted chocolate, then tap off the extra chocolate before placing it back on parchment paper. Work fairly quickly so the filling stays firm. This is a great time to use a fork or dipping tool if you want less mess, but a spoon works too.
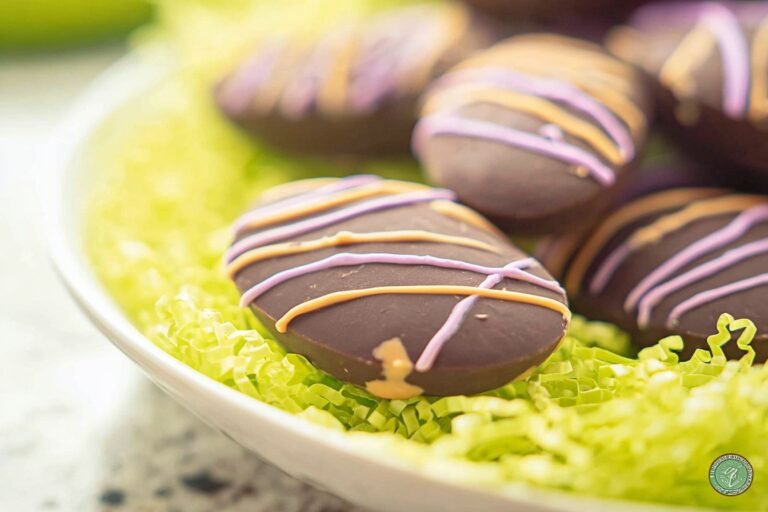
7-Step 7: Decorate and set Drizzle a little extra melted chocolate over the eggs for a pretty finish. Let them set at room temperature until the coating firms up. If you want a faster finish, a short chill in the fridge can help, but room temperature setting keeps the shell smooth and shiny.
8-Step 8: Serve or store Once set, your peanut butter chocolate eggs are ready to serve. You can enjoy them right away or store them in an airtight container. For longer storage, freeze them and thaw when needed. These are a smart make-ahead treat for holidays, snack boxes, and dessert tables.
Last Step:
Please leave a rating and comment letting us know how you liked this recipe! This helps our business to thrive and continue providing free, high-quality recipes for you.Notes
🧤 Wear food-safe gloves when shaping to prevent sticky mess.
🔥 Microwave extra 10 seconds if mixture is lumpy for smooth texture.
🌰 Swap peanut butter for almond or cashew; add more sugar if needed.
- Prep Time: 20 minutes
- Chilling Time: 30 minutes
- Category: Desserts
- Method: No-Bake
- Cuisine: American
- Diet: Vegetarian, Gluten-Free
Nutrition
- Serving Size: 1 egg
- Calories: 423 kcal
- Sugar: 37g
- Sodium: 147mg
- Fat: 29g
- Saturated Fat: 13g
- Unsaturated Fat: 16g
- Trans Fat: 0.3g
- Carbohydrates: 42g
- Fiber: 3g
- Protein: 6g
- Cholesterol: 20mg