Ingredients
Instructions
1-First Step: Gather and measure everything Start by measuring all of your ingredients before you turn on the stove. Chop the fresh pineapple into very small pieces so it softens quickly and blends into the glaze. If you are serving a crowd, this is also a good moment to set out your ham, roasting pan, and pastry brush. Using premeasured ingredients makes the process smooth for busy parents, students, or anyone cooking while juggling side dishes. If you are planning ahead, you can chop the pineapple earlier in the day and store it in the fridge until you are ready to cook.
2-Second Step: Combine the base in a small pot Add the chopped pineapple, pineapple juice, brown sugar, cinnamon, and cloves to a small to medium pot. Stir well so the sugar starts to dissolve and the spices spread evenly through the mixture. The pineapple juice helps loosen the brown sugar at first, then the mixture thickens as it cooks. If you want a smoother glaze, stir a little longer before heating so the sugar starts to blend with the juice. This step matters because even mixing helps the glaze cook evenly and keeps the flavor balanced from the first spoonful to the last.
3-Third Step: Bring the glaze to a boil Set the pot over high heat and bring the mixture to a boil. Watch it closely because the sugar can bubble up fast. Once it reaches a boil, lower the heat right away so it does not scorch or boil over. This is the point where the kitchen starts smelling amazing. The pineapple and warm spices work together, and the glaze begins to look glossy as the sugar melts into the fruit and juice.
4-Fourth Step: Simmer until thickened Let the Pineapple Ham Glaze simmer for about 10 minutes, stirring now and then. You want it to reduce into a syrupy texture that coats the back of a spoon. Keep the heat low enough that the glaze bubbles gently instead of aggressively. A slow simmer helps you avoid burning the sugar and keeps the glaze smooth. If you are making this for a holiday ham, stay near the stove during this step so you can adjust the heat as needed. For a thicker glaze, give it a minute or two more, but do not walk away.
5-Fifth Step: Stir in the butter Once the glaze has thickened, add the unsalted butter and stir until it melts fully. The butter gives the glaze a shiny finish and rounds out the sharp edges of the pineapple and spices. If you want the glossiest result, add the butter at the very end while the glaze is still hot. This small finish makes a big difference. It helps the glaze cling to the ham and gives it that rich, caramel look people expect from a classic holiday centerpiece.
6-Sixth Step: Use right away or cool for storage You can use the glaze immediately while it is warm, or let it cool if you plan to store it. If you are glazing a ham, brush it on while the glaze is still easy to pour and spread. If it thickens too much as it cools, warm it gently with a splash of pineapple juice. For serving, this glaze pairs especially well with baked ham, but it can also work on pork roast or even roasted vegetables if you want a sweet-savory coating. If you like mixing holiday desserts with your dinner menu, a cozy bake like classic apple crumble can be a nice finish after a pineapple-glazed meal.
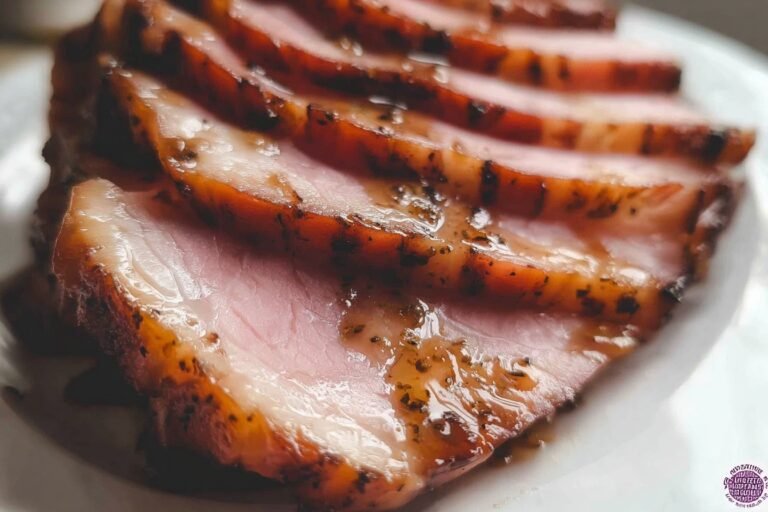
7-Seventh Step: Glaze the ham properly Score the ham in a crosshatch pattern before glazing so the syrup can sink into the surface. Brush on about one quarter of the glaze, then bake wrapped at 325°F for 90 minutes. After that, uncover the ham, add more glaze, and bake at 400°F for 30 to 40 minutes until the top looks caramelized. This method helps build flavor in layers. The first glaze soaks in, and the second round creates that shiny, sticky outer coat. For best results, brush the glaze on in several thin layers rather than one thick layer.
8-Eighth Step: Check doneness and rest before slicing If you are baking a fully cooked ham, your goal is usually to heat it through and caramelize the outside without drying it out. Use a meat thermometer in the thickest part, away from the bone, and follow your ham package directions for safe temperature. Once the ham is done, let it rest for about 15 minutes before slicing. Resting helps the juices settle so each slice stays moist. If you have leftovers, the glaze can add a nice touch to warm sandwiches the next day.
Last Step:
Please leave a rating and comment letting us know how you liked this recipe! This helps our business to thrive and continue providing free, high-quality recipes for you.Notes
🔥 Simmer on low heat to thicken without burning or boiling over.
🧈 Add cold butter at end for shiny, professional glossy sheen.
🔪 Score ham in crosshatch before glazing for max flavor absorption.
- Prep Time: 5 minutes
- Cook Time: 20 minutes
- Category: Sauces & Condiments
- Method: Stovetop
- Cuisine: American
- Diet: Gluten-Free, Vegetarian
Nutrition
- Serving Size: 2 tablespoons
- Calories: 469 kcal
- Sugar: 100g
- Sodium: 27mg
- Fat: 6g
- Saturated Fat: 4g
- Unsaturated Fat: 2g
- Trans Fat: 1g
- Carbohydrates: 107g
- Fiber: 2g
- Protein: 1g
- Cholesterol: 15mg