Ingredients
– Nonfat milk
– All-purpose flour
– Sugar
– Unsalted room temperature butter
– Optional ground cardamom
– Fresh or dry yeast
– Salt
– Unsalted room temperature butter for filling
– Sugar for filling
– Vanilla sugar or extract
– Salt for filling
– Fresh or frozen raspberries
– Beaten eggs for topping
– Pearl sugar for topping
Instructions
First Step: Prepare the Dough Begin by mixing the dough ingredients in a stand mixer with a hook attachment, starting on low speed and then bumping it up to medium-fast for about 30 minutes to develop that gluten. Once it’s smooth, shape it into a large, thin rectangle, wrap it in plastic, and pop it in the fridge for at least one hour to chill this helps with handling later. If you’re adapting for dietary needs, like using gluten-free flour, mix it a bit longer to ensure the dough holds together well.
Second Step: Make the Filling While the dough is chilling, combine the butter, sugar, vanilla, and a pinch of salt in a bowl to create a smooth filling mixture. This step is quick and lets the flavors meld, so give it a good stir until everything is creamy. For a vegan twist, use a plant-based butter here to keep the filling delicious and inclusive.
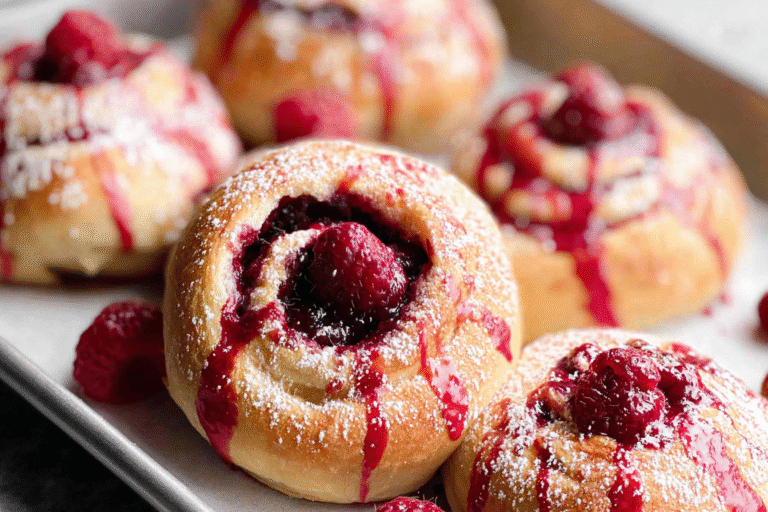
Third Step: Assemble the Buns After the dough has rested, roll it out into a rectangle about 1 cm thick on a floured surface. Spread the filling evenly over the dough and sprinkle on the raspberries crushed frozen ones work great for even distribution. Fold the dough into thirds, then roll it out thicker to about 2.5 cm, and cut it into strips weighing roughly 85 grams each before shaping them into twists or your preferred form.
Fourth Step: Proof the Dough Place the shaped buns on a baking tray, cover them loosely, and let them rise until they’ve doubled in size, which could take 1 to 4 hours depending on your room’s warmth. This proofing step is key for that light, airy texture, and if you’re in a hurry, a warmer spot can speed things up a bit. Adapt this for low-calorie versions by being mindful of rising times with lighter ingredients.
Fifth Step: Bake the Buns Preheat your oven to 200°C (400°F) and bake the buns for about 9 minutes, rotating the tray halfway through to avoid uneven browning keep an eye on them since the juicy filling might affect the time. They’re done when they’re golden brown, so pull them out and let that raspberry goodness shine. For different preferences, like making them sweeter, consider adding a light glaze post-bake.
Final Step: Finish and Serve Right after baking, brush the hot buns with beaten egg or simple syrup for a glossy finish, then sprinkle on pearl sugar while they’re still warm to soften the crust and add extra sparkle. Let them cool on a rack before serving to keep them from getting soggy, and enjoy with a cup of tea for the best experience. These buns store well, but they’re so tasty, they might not last long!
Last Step:
Please leave a rating and comment letting us know how you liked this recipe! This helps our business to thrive and continue providing free, high-quality recipes for you.Notes
🍇 For a more even raspberry layer, use crushed frozen raspberries or raspberry paste.
🌀 Twisted shapes are ideal to showcase raspberries and create an appealing look.
⏳ Allow buns to cool before serving to enjoy optimal texture and flavor.
- Prep Time: 35 minutes
- Rising and resting: 2-5 hours
- Cook Time: 9 minutes
- Category: Dessert
- Method: Kneading, proofing, and baking
- Cuisine: Swedish
- Diet: Vegetarian
Nutrition
- Serving Size: 1 bun