Ingredients
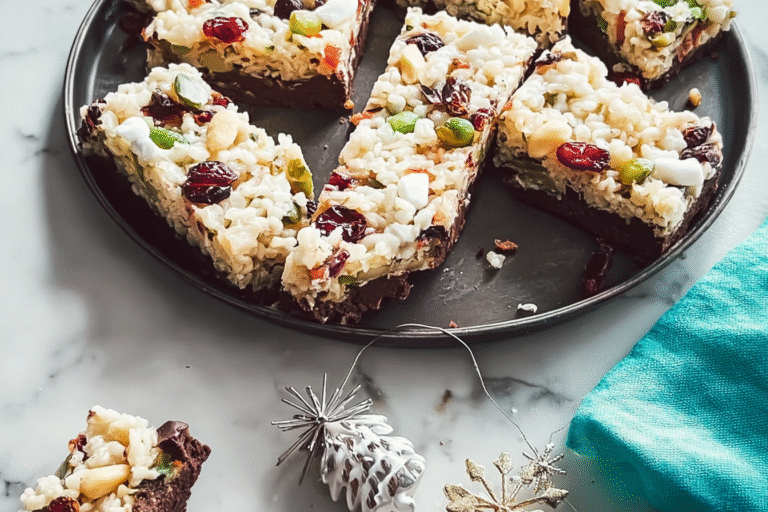
4 cups Rice Krispies cereal This provides a crisp texture and base structure, helping the bars hold together while adding a fun, light element that echoes the film’s playful energy.
2 cups desiccated coconut Offers a tropical sweetness and moisture, contributing healthy fats that support wellness for diet-conscious individuals and seniors.
1 cup chopped mixed nuts (such as almonds and cashews) Adds crunch and protein, boosting the nutritional value with essential nutrients that make this treat satisfying for busy parents and students.
1 cup chopped glacé cherries Brings a burst of fruity sweetness and color, enhancing the visual appeal and tying into holiday themes from the movie.
2 tablespoons butter Acts as a binding agent when melted, ensuring the mixture sticks together while adding richness to the overall flavor.
1/2 cup sweetened condensed milk Provides creaminess and sweetness, helping to coat the dry ingredients evenly for a cohesive treat.
1 teaspoon vanilla extract Infuses a warm, aromatic note that elevates the taste, making the dessert more inviting for family gatherings.
Instructions
1-First Step: Mixing the Dry Ingredients Start by combining the dry elements in a large bowl. Mix 4 cups Rice Krispies cereal, 2 cups desiccated coconut, 1 cup chopped mixed nuts, and 1 cup chopped glacé cherries thoroughly. This step takes about 2-3 minutes and ensures even distribution, which is key for a consistent texture in the final bars. By folding these ingredients gently, as suggested in the tips, you maintain their crunch and prevent over-mixing, which can affect the outcome. For dietary adaptations, substitute dried fruits for cherries here if needed, making it easier for vegan or allergy-sensitive preparations. This initial mix sets the foundation for the treat’s delightful contrast of textures.
2-Second Step: Preparing the Wet Mixture Next, melt 2 tablespoons of butter over low heat in a saucepan, which should take about 1-2 minutes to avoid burning. Once melted, add 1/2 cup sweetened condensed milk and stir gently until the mixture warms through, typically another 2-3 minutes. Remove from heat and stir in 1 teaspoon vanilla extract for added flavor. This warm mixture acts as the binder, so keep the heat low to preserve the ingredients’ quality. If making a vegan version, use plant-based butter and milk alternatives at this stage to keep the process smooth. Timing is crucial here to ensure the mixture doesn’t cool too quickly before combining with the dry ingredients.
3-Third Step: Combining and Pressing the Mixture Pour the warm wet mixture over the dry ingredients in the bowl and fold gently until everything is evenly coated, which should take 1-2 minutes. Press the mixture firmly into a lined baking tray or mold to help it set properly, using the back of a spoon for even compression. Gentle folding, as per the tips, helps maintain the texture without making it soggy, enhancing the final product’s appeal. For low-calorie options, consider pressing it into smaller molds to control portion sizes. This step is where the recipe’s no-bake nature shines, requiring no oven and minimal effort for busy schedules.
4-Fourth Step: Refrigeration and Setting Refrigerate the pressed mixture for at least 2 hours, or until fully set, to achieve the firm texture that makes these bars easy to cut and serve. This cooling process is essential for the ingredients to bind properly, resulting in clean slices. During this time, you can prepare other holiday elements, like a refreshing drink from the blog’s collection. If you’re adapting for gluten-free needs, ensure your tray is clean and free of contaminants. For those monitoring calories, check the nutritional breakdown to adjust servings accordingly. This step aligns with tips for keeping bars firm, ensuring they hold up during holiday events.
5-Final Step: Serving and Finishing Touches Once set, cut the mixture into squares or bars for serving, yielding about 12-16 pieces depending on size. Serve immediately for the best texture, pairing it with a similar spiced oatmeal treat from the blog for a complementary experience. The total preparation time is around 15 minutes plus chilling, making it ideal for entertainment enthusiasts. Nutritional values remain consistent, so consider these when planning for groups. This final touch, inspired by the film’s memorable music and visuals, turns a simple recipe into a holiday highlight, adaptable for various diets as noted. For further ideas, explore how this fits into meal prep routines on the blog.
Last Step:
Please leave a rating and comment letting us know how you liked this recipe! This helps our business to thrive and continue providing free, high-quality recipes for you.Notes
🌰 Use lightly salted nuts to balance the sweetness of the bars.
🍒 Fold the mixture gently to maintain the crispy texture of the cereal.
❄️ Refrigerate thoroughly to ensure the bars set firmly for easy cutting and serving.
- Prep Time: 10 minutes
- Chilling time: 2 hours
- Category: Dessert
- Method: No-bake mixing and chilling
- Cuisine: American
- Diet: Vegetarian
Nutrition
- Serving Size: 1 bar
- Calories: 200
- Sugar: 18 grams
- Sodium: 50 mg
- Fat: 9 grams
- Saturated Fat: 5 grams
- Unsaturated Fat: 3 grams
- Trans Fat: 0 grams
- Carbohydrates: 28 grams
- Fiber: 2 grams
- Protein: 3 grams
- Cholesterol: 10 mg